High Voltage and X-Ray Experiments
Text and Graphics Copyright © 2005 − 2010 Henning Umland
The following descriptions are given for the purpose of information only. I do not encourage ANYBODY to conduct experiments like those shown below, and I do not assume liability for any damage resulting from such experiments. People working with high voltage and X-rays should have a solid background in physics and electronics and should know what they are doing. The high voltage sources described here are much more powerful than generators of static electricity like, e. g., influence machines, Van de Graaff generators, etc. High voltage can kill instantly, X-rays in the long run (radiation sickness, cancer) if not handled properly.
Making Photographic X-Ray Images (II)
Digital X-ray Photography
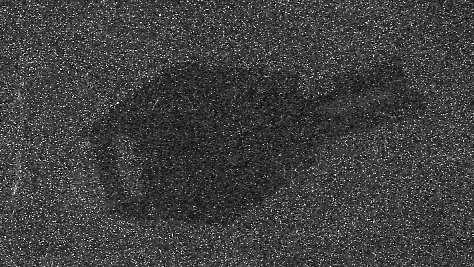
The following image documents my unsuccessful attempt to use an ordinary flatbed scanner for digital X-ray photography. I put a sheet of black paper on the glass plate of the scanner (Canon LIDE 25) and a small key (from a suitcase) on the paper. While irradiating the key from above (40 cm distance), I started the scanner. The resulting picture reveals the shape of the key but is extremely noisy since the sensor is not very sensitive to X-rays. Actually, the original image was very flat, so I had to increase the contrast with a graphic editor afterwards. It may be possible, however, to use a flatbed scanner in combination with a fluorescent screen. The lamp of the scanner would have to be deactivated in this case. Preferably, the glass plate of the scanner should be made of lead glass to prevent the X-rays from reaching the CCD sensor and creating a second image.
|
Digital Image of Key
"Semi-Digital" X-ray Photography
Since I did not have an image sensor suitable for X-rays, I tried to utilize my digital camera for X-ray photography. For this purpose, I built the following experimental setup:
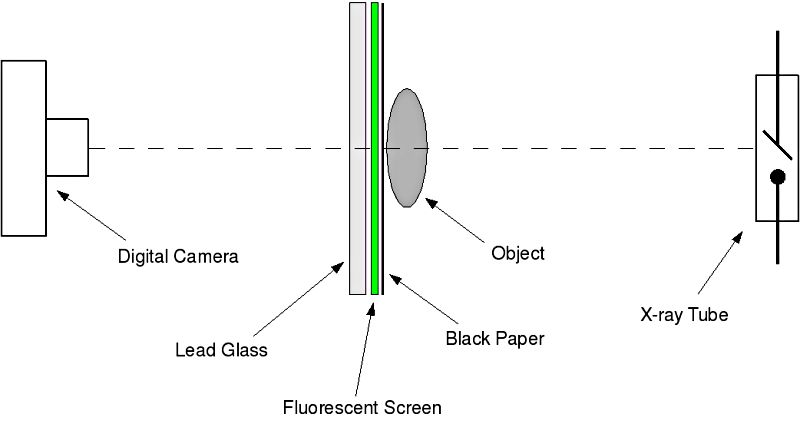 |
X-Ray Photography with Fluorescent Screen and Digital Camera
The film holder used in earlier experiments has been replaced by a sandwich of black paper (or aluminum foil), a fluorescent screen, and a transparent shield (preferably lead glass). The object is between the black paper and the X-ray tube. The X-rays passing through the object penetrate the black paper and create a visible image on the fluorescent screen. The black paper blocks visible light emitted by the tube filament and improves image contrast. This is necessary because the fluorescent screen (coated plastic foil) is not entirely opaque. The visible image on the fluorescent screen is recorded by the camera which is behind the glass plate. The latter protects the camera from X-rays penetrating the fluorescent screen. Otherwise, the CCD sensor of the would produce a very noisy image.
The camera was a Nikon D200 with a 18-70 mm zoom lens. The distance between the back of the camera and the fluorescent screen was 33 cm. This is the shortest focusing distance with this lens in the 70 mm position. The autofocus was turned off since it does not work accurately under these conditions. The distance between X-ray tube and object was 50 cm. Since I did not have a lead glass plate at that time, I used a small round window (12.5 cm diameter) of 30 mm armored glass (originally belonging to a Russian tank), hoping that it would absorb the X-rays sufficiently.
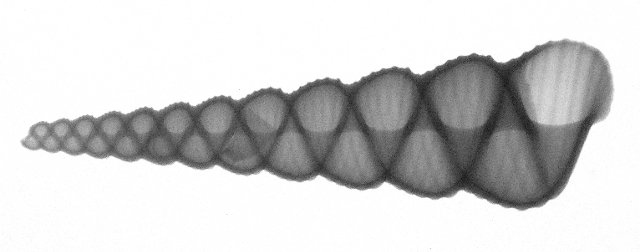
Here is the first test shot, a picture of the snail shell shown earlier (one of my favorite test objects). The tube was run at 70 kV / 1 mA. Camera settings: 200 ASA, f/11, 20 s (autoexposure turned off). The raw image file was processed with UFRAW (brightness and contrast). Final adjustments and moderate sharpening were performed with GIMP. Still, the image is not very crisp. The image is also slightly noisy. There are small bright spots visible in the darker parts of the picture. This is an indication that the glass plate does not absorb 100% of the radiation.
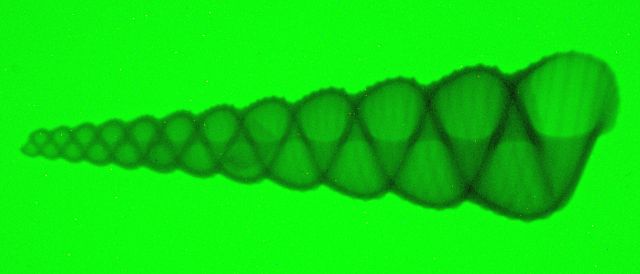 |
Digital Image of Snail Shell
The following photo of the same object was made after I acquired a plate of lead glass (18×24 cm, lead equivalent: 1.8 mm @ 110 kV). I further replaced the zoom lens with a 50 mm macro lens and applied a manual focus correction. Instead of UFRAW, I used RAW THERAPEE 2.41 for image processing. The image quality is definitely better than before. Camera settings: 400 ASA, f/8, autoexposure (exposure time approx. 14 s).
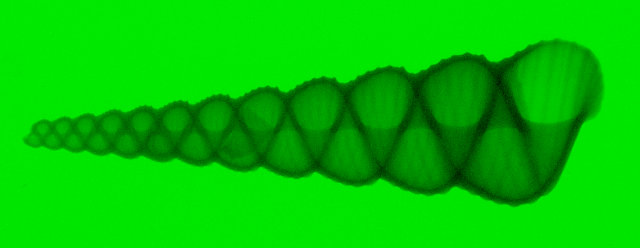 |
Improved Digital Image of Snail Shell
This is how the photo looks after desaturation. It would have been less grainy if I had set the camera sensitivity to 100 ASA instead of 400 ASA:
 |
Desaturated Image of Snail Shell
Here are a few other examples:
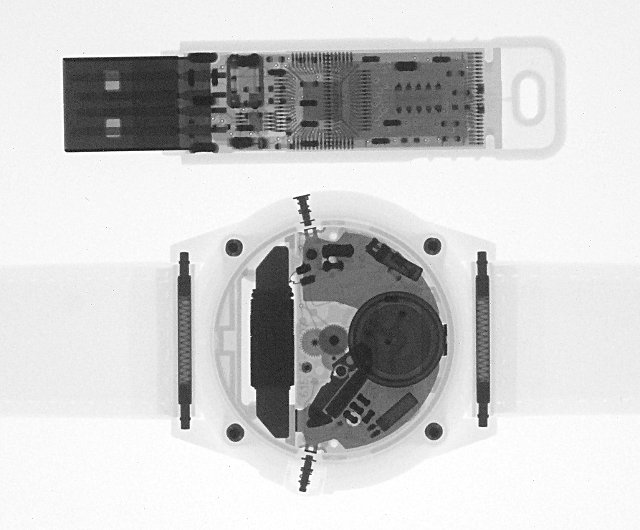 |
USB Stick and Radio-Controlled Wristwatch
 |
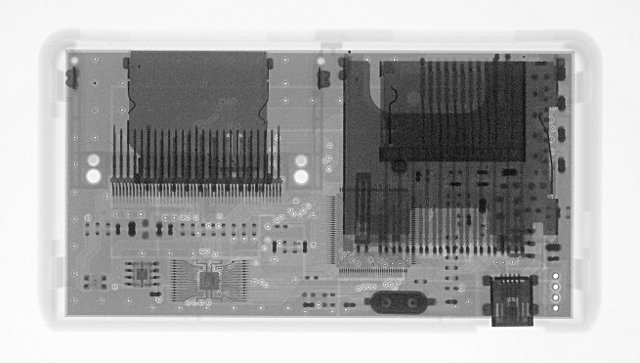
Pocket Calculator
 |
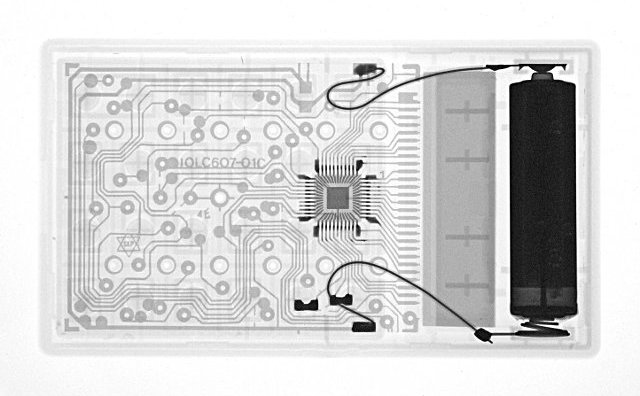
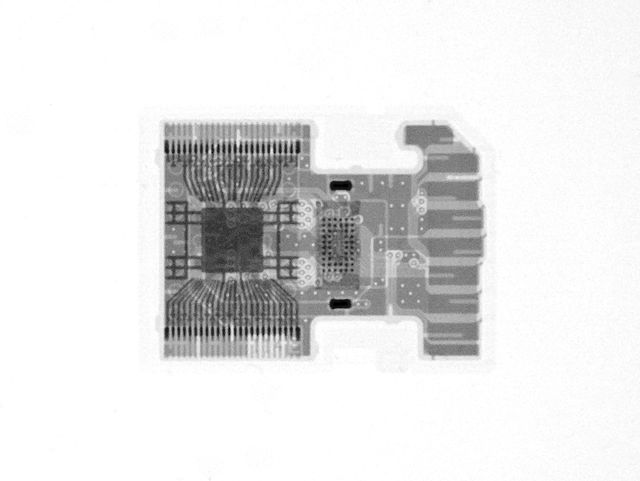
USB Card Reader
 |
Memory Card (SD)
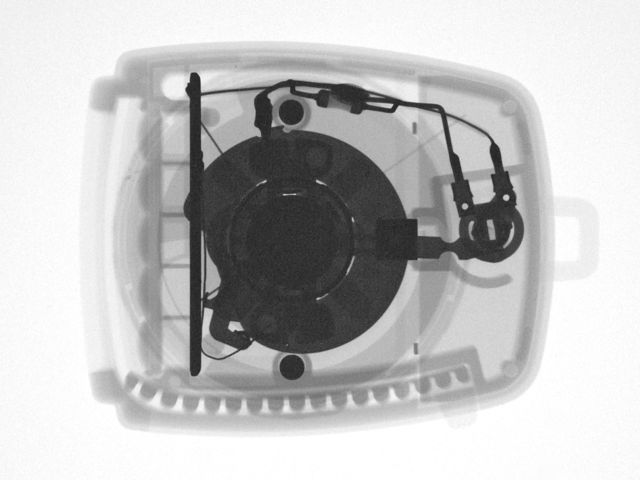 |
Exposure Meter (Gossen Sixtino)
The following picture shows a small light bulb from a Christmas decoration (original length: 4.5 cm). This time I used a more sensitive fluorescent screen. In spite of decreasing the camera sensitivity from 400 ASA to 200 ASA, the exposure time was reduced to approx. 5 seconds. As with photographic films, there is a trade-off between sensitivity and image definition, but the results are still acceptable.
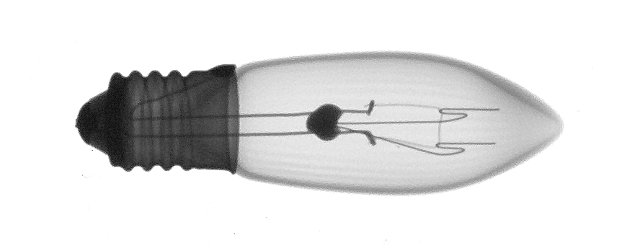 |
Light Bulb
Here is an old Russian radio tube 12Ж1Л (12SH1L). The glass bulb is usually not visible since it is protected by an aluminum cylinder.
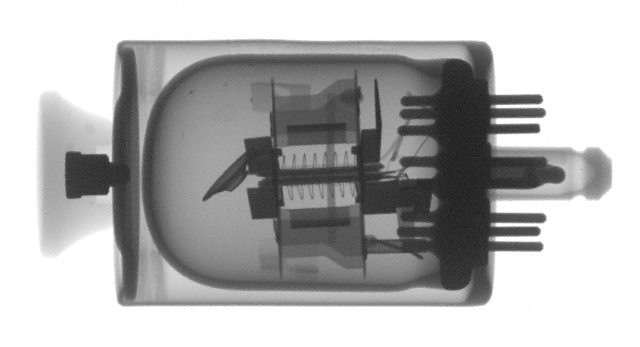 |
Russian Radio Tube 12Ж1Л
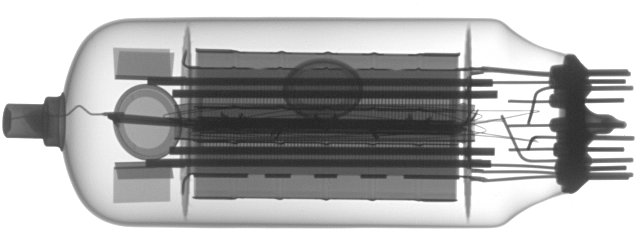
The 6KD6 is an old beam-power tetrode for color tv sets (sweep tube):
 |
6KD6
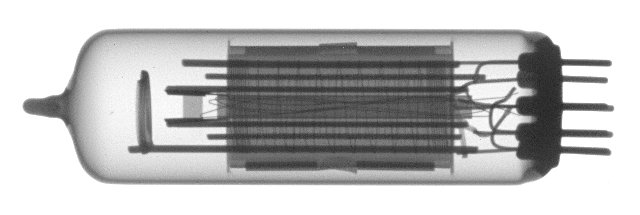
The EL84 is a pentode for audio amplifiers. The image is more grainy due to a higher magnification factor:
 |
EL84
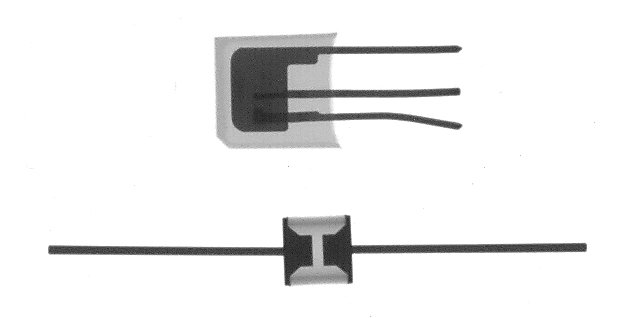
This image shows a small thyristor and a spark gap (transient voltage suppressor):
 |
Thyristor & Spark Gap
Here is a very old 200 kHz quartz resonator:
 |
200 kHz Quartz
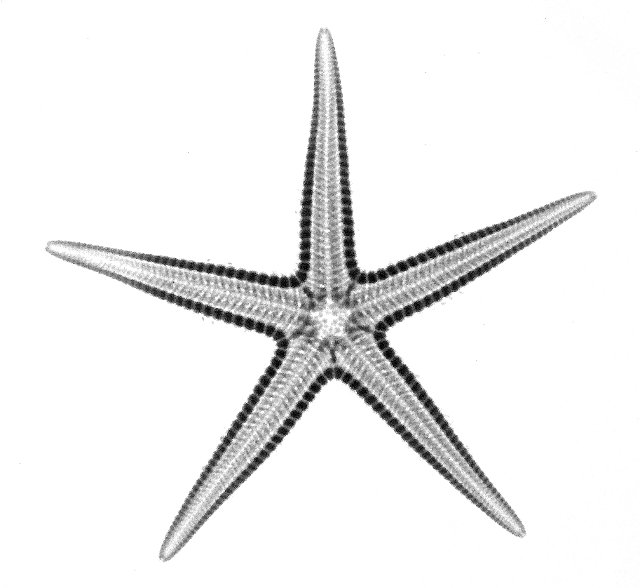
This picture shows a small starfish. Since the object was highly translucent, I had to reduce the tube voltage to 50 kV and increase the image contrast strongly afterwards (this explains the grainy appearance).
 |
Starfish
Here is another 50 kV radiograph. The image is rather soft due to the low contrast of the objects. Moreover, I used the "despeckle" filter to reduce graininess. Unfortunately this filter tends to soften the image even more.
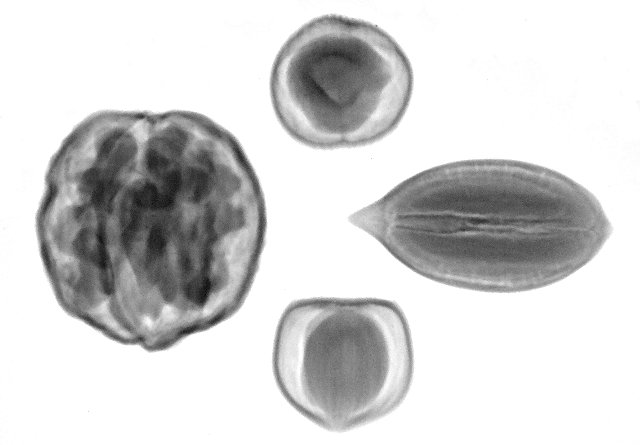 |
Walnut, 2 Hazelnuts, Pecan Nut
Will be continued...